How Long Does It Take to Do an Oil Change? Here’s How to Do It Yourself
In the intricate symphony of car maintenance, few tasks resonate as fundamentally as the oil change. A chore often relegated to service centers, it is a crucial ritual that breathes vitality into your vehicle’s heart—the engine. In this blog post, we’ll unravel the mysteries surrounding the time it takes to perform this automotive essential and illuminate the step-by-step process of executing a DIY oil change.
Beyond the nuts and bolts of the procedure, we’ll explore the artistry behind this seemingly routine task, demystifying it for both novices and seasoned DIY enthusiasts alike. So, grab your tools and join us on the road to mastering the delicate choreography of oil changes.
How Long Does It Take to Do an Oil Change?
The duration of an oil change can vary depending on the type of oil your car uses. Conventional oil changes typically take less time than synthetic or synthetic blend changes. On average, a professional oil change at a service center may take anywhere from 30 to 60 minutes, factoring in additional services like filter replacement and a quick vehicle inspection.
While more time-consuming for beginners, once you become familiar with the process, you can complete a DIY oil change in about 60 to 90 minutes. Keep in mind that efficiency tends to improve with experience, and having the right tools can significantly streamline the task.
Tools and Materials You’ll Need
First things first, let’s talk about what you’ll need. It’s not a huge list, and you probably have most of these items lying around. You’ll need a good quality socket set because, trust me, the right tools make all the difference. Gloves are a must—not just to keep your hands clean but to protect them from harsh chemicals. Oil isn’t exactly hand lotion! Have plenty of paper towels on hand for the same reason, plus they’re great for wiping up any spills.
You’ll also need the correct type and amount of oil and a new oil filter—make sure they’re suited for your car model, which you can find in your owner’s manual or a quick online search. It’s crucial to use a high-quality filter; this isn’t the place to skimp. An oil filter wrench might come in handy if things are a bit tight down there. Of course, don’t forget an oil catch pan to keep things neat and make recycling used oil easier, and a funnel to avoid spillage when you’re pouring in new oil.
If you don’t have a garage with a pit for easy access underneath your car, you’ll likely need a jack and jack stands or a pair of sturdy ramps. Always secure your car with tire blocks or a piece of wood to prevent it from rolling back when elevated.
How To Do an Oil Change
Now, let’s break down the oil change process into simple steps:
Prepping Your Car
Now that you’ve got your tools lined up, it’s time to prep your car. If it’s your first time, you might be tempted to rush right in, but a little prep goes a long way. Start by parking your car on a level surface and engaging the parking brake. If you’re using ramps, guide your car up slowly and securely. For jacking, refer to your car’s manual for the specific points where the jack and stands should be placed to avoid damage.
Before you lift the car, block off the rear tires to prevent any rolling. Once the car is securely elevated, give it a little shake to make sure it’s stable. Safety first, always!
Draining the Old Oil
Alright, you’re set up and it’s time to get your hands dirty. Slide under your car and locate the oil pan; it’s usually easy to spot. Look for the drain plug. Before you unscrew it, position your oil catch pan underneath because things are about to get a bit messy. Use the correct size socket to loosen the plug, and once it’s loose, you can usually unscrew it by hand. Let the old oil drain completely—patience is key here.
Changing the Oil Filter
Next up is the oil filter, and it can be a bit trickier. If it’s too tight, grab your oil filter wrench. Once you’ve removed the old filter, take a moment to prime the new one with some fresh oil. Rub a little oil around the rubber seal of the new filter too—this ensures a good seal and makes the filter easier to remove next time.
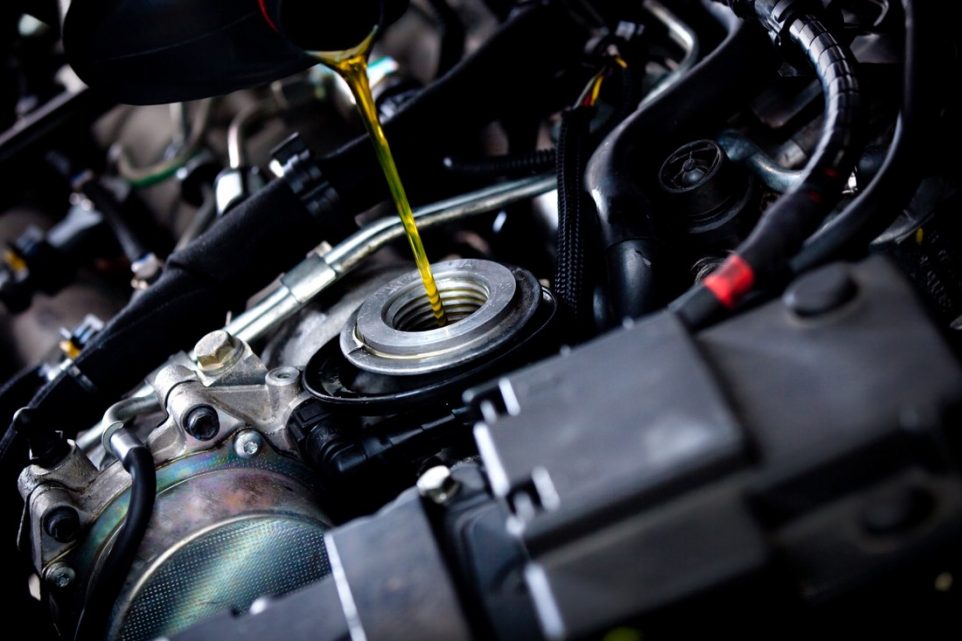
Adding New Oil
Now for the fun part—adding new oil. Find the oil cap on top of your engine, clean around it to prevent dirt from falling in, and remove it. Place your funnel and pour in the new oil. Check your owner’s manual for the exact quantity your car needs. It’s better to add a little at a time and check the level with the dipstick than to overfill.
Once done, replace the oil cap and start your car. Let it run for a few minutes to allow the new oil to circulate. Turn it off and check the oil level again after a few minutes. Add more if necessary, but be careful not to overfill.
Cleaning Up
After your oil change is complete, don’t forget about clean-up. Dispose of your old oil responsibly. Many auto shops accept used oil for recycling, which is a relief because no one wants old oil hanging around.